MiniTool Partition Wizard Server
- Convert NTFS to FAT.
- Copy Dynamic disk volume.
- GPT Disk and MBR Disk interconversion.
- Copy UEFI boot disk.
- Convert GPT-style Dynamic Disk to Basic.
- Move Boot/System volume for Dynamic Disk.
Change partition sizes
-
Changing partition size is not a difficult thing for most computer users. With more and more choices of partition magic, we can find so many partition magic helping us realize changing partition size. In the latest Microsoft operating systems, we can use built-in disk management tool to change partition size. Hence, changing partition size is not difficult for common users.
However, changing partition sizes at the same time is not an easy thing. You should know that even Windows Server 2008 or Windows 7 built-in disk management tool can't realize changing partition sizes at the same time. Is there a suitable solution to this problem? The answer is absolutely yes. This article will introduce a good solution to you.
Significance of changing partition seizes
Then what is the significance of changing partition sizes at the same time? Since it is a very common situation that partition space is insufficient but the adjacent partition still has much unused space, so we can change partition sizes at the same time to change this situation. We can compress unused space and then extend partition that is short of free space. This apparently simple operation can't be realized by most partition magic such as built-in disk management tool. Even though it can compress single partition, it can only make unallocated space behind the compressed partition. It is impossible for us to extend partition with non-adjacent space. That's why we need the software which is able to change partition sizes at the same time. Where can we find such a solution? MiniTool Partition Wizard is the best choice for us at this time. The following is a demonstration of changing partition sizes with MiniTool Partition Wizard:
MiniTool Partition Wizard changes partition sizes
Initially, visit http://www.resize-partition.com to download MiniTool Wizard and then install it. When installing, we'd better not install it to the partition needing resizing so that we can avoid trouble of rebooting computer. Launch MiniTool Partition Wizard after installing:
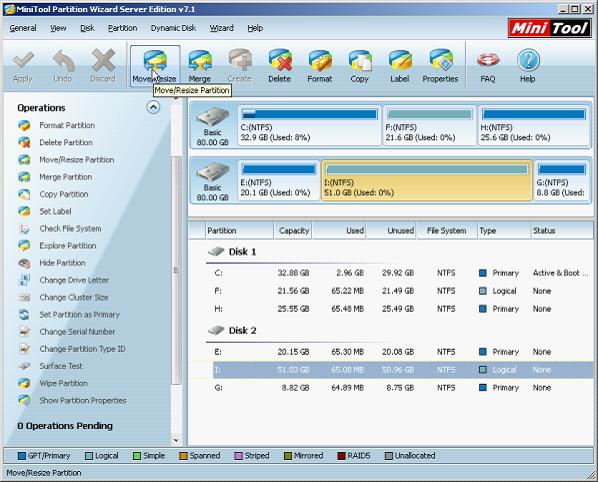
In main interface, we can check condition of all partitions. To shrink partition I: and then extend partition G:, we should firstly select partition I: and then click on "Move/Resize" button to start shrinking:
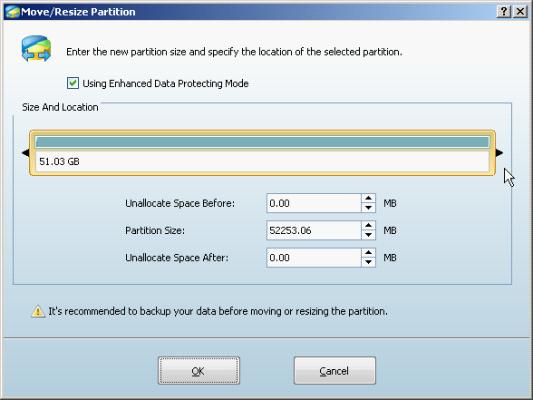
In this interface, we can drag the partition handle border to shrink partition I:
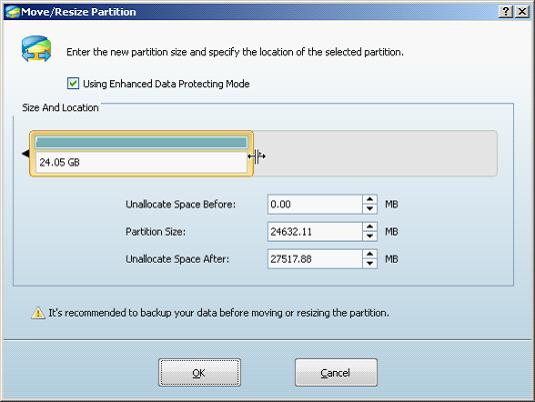
After setting, click "OK" button to return to main interface:
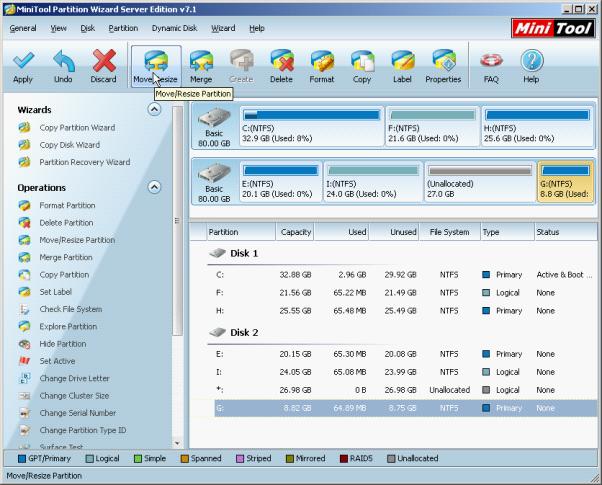
In main interface we can find that there is an unallocated space behind partition I:. Now, we can use this unallocated space to extend partition G:. Select partition G: and then click on "Move/Resize" button:
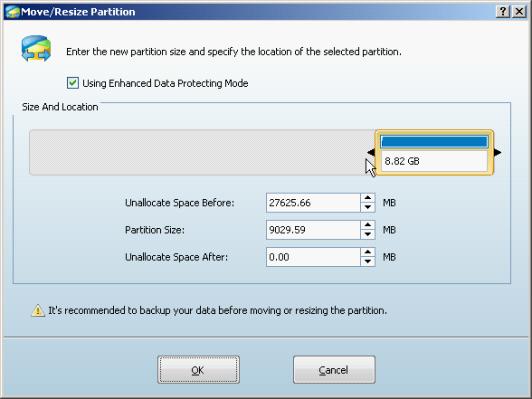
In this interface, drag partition handle border to extend partition G:
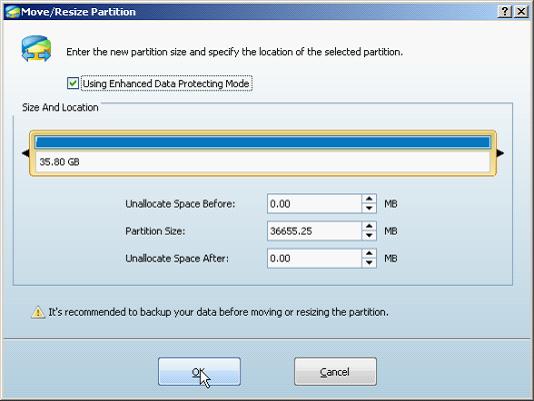
After extending, click "OK" button to return to main interface, and we can preview the effect:
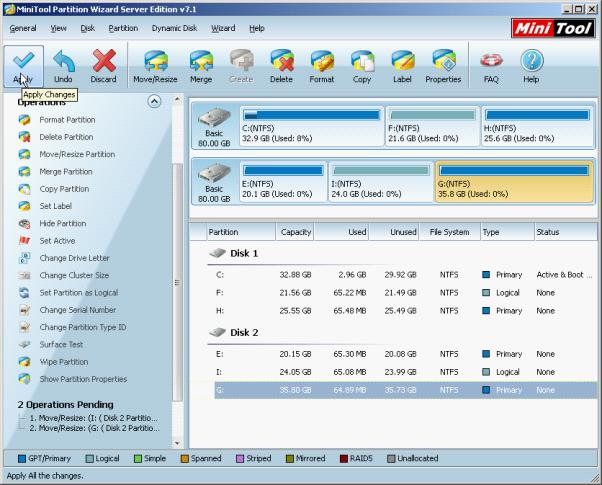
In main interface, we can find that we have successfully changed partition G: size. There are two pending operations in the "Operation Pending" area at the left. At last, remember to click on "Apply" button to finish changing partition sizes.
Through this demonstration, we can see that we have only used "Move/Resize" function of MiniTool Partition Wizard. How simple it can be to change partition sizes with MiniTool Partition Wizard. The other functions of MiniTool Partition Wizard are also very easy-to-use. You can visit the website for more detailed information.


